Updating Your Stairs.
Project challenge was to update the entry way. The onrigional entry way had a white door, white stairs, powder blue paint and a powder blue stair runner. 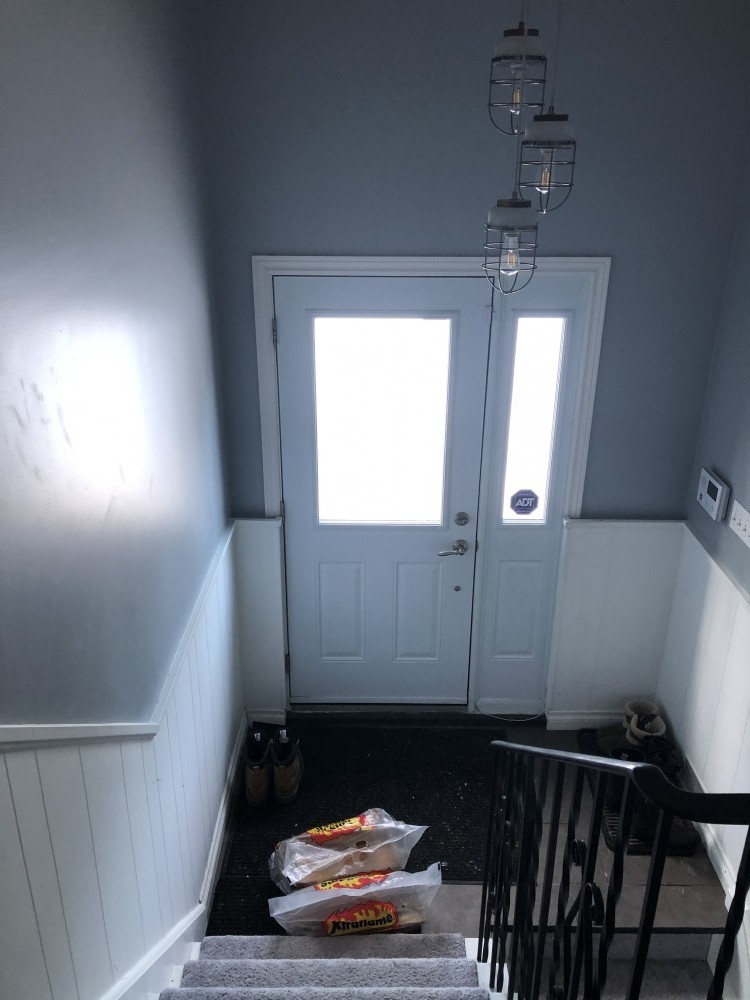
When it was frst done I’m sure it looked very clean. The carpet was plush intexture, onot the best choice for a high traffic area like a front entry. Within a few months it was worn down and looked ragged, it also started to carry a smell from collecting mpistire from dogs and people coming in and out through the winter and rainy days.
Change needed to happen….
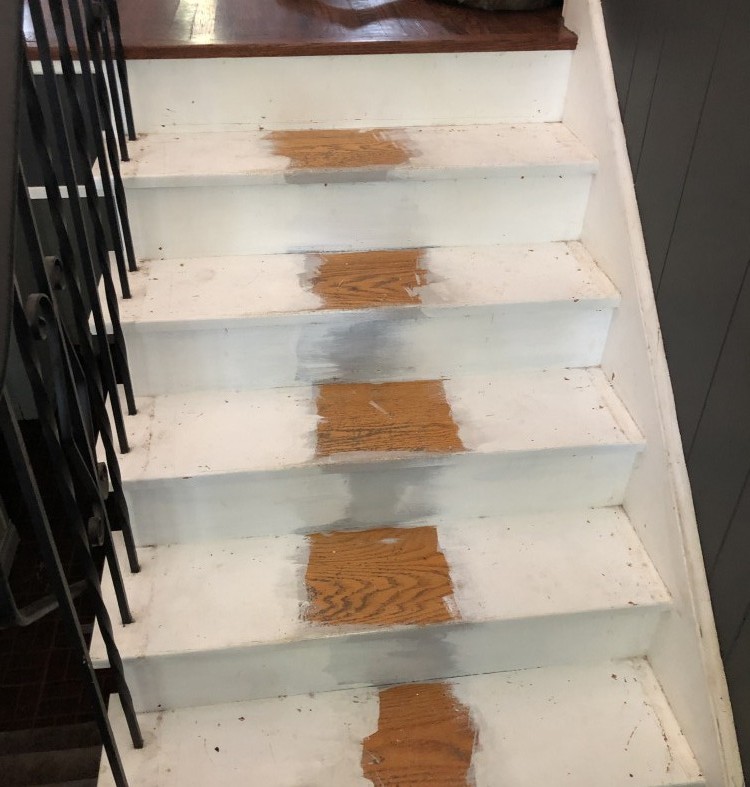
Removing the carpet was a bit of a task, there was a tack strip at the back of the riser that the carpet was nailed down to, alond with an abondance of small staples throughout that did all come out when we pulled up the carpet and had to be pulled up by plyers one by one…
Was no suprise that they origional job wasnt done with much care, I see this alot. They paninted the areas you would see white and left the centre the natural oak wood that the stairs origioanlly were.
No Big deal, we will just finish it right.
The materials I needed for the job were pretty simple.
- primer
- paint
- paint brushes
- sand paper
- roller and tray
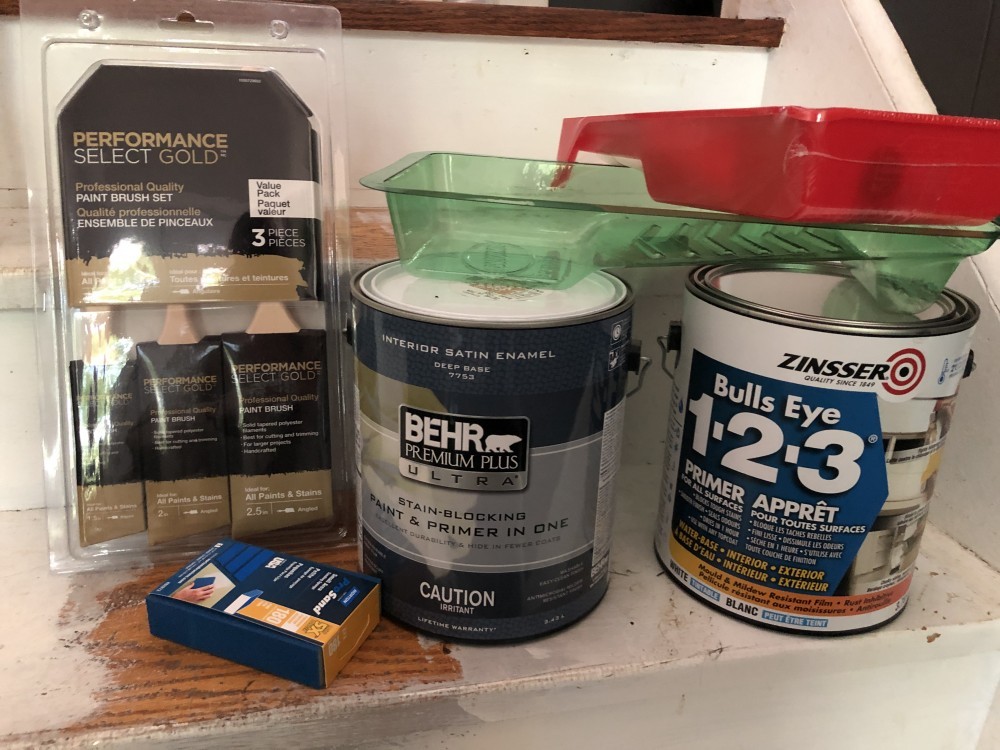
First step was to lightly sand the stairs and use this oportunity to look for and missed nails or stamples. Youndont need to sand it hard, you are just trying to create a surface for the new coat of primer to stick to. Once you have sanded down the stiars you will want to clean them, I use a swiffer wipe and a damp cloth to make sure I get the extra dust off.
The primer I got said it only needed about an hour to dry, because I was using it on stairs I really wanted to be sure it was completly dry before I put on the second coat, so I left it over night.
I only used one coat of the primer. I didnt need the primer to be a perfect coat with multiple layers, I simply needed it as a solid base for the paint to stick to.
The first coat of paint went on well, its a darker color so I expected to have to do two coats. The second coat when I finallym did it was perfect.
I experimented with how I wanted it painted, if I was just going to do the steps in the dark or if i was going to do the whole stair case int he dark. Ultimetly the decission was to make the whole thing dark since the new tile that was going in the landing was a wood look tile and was going to be laid in a heringbone patter. In such a small area it would be way to much to have all the different finishes and details.
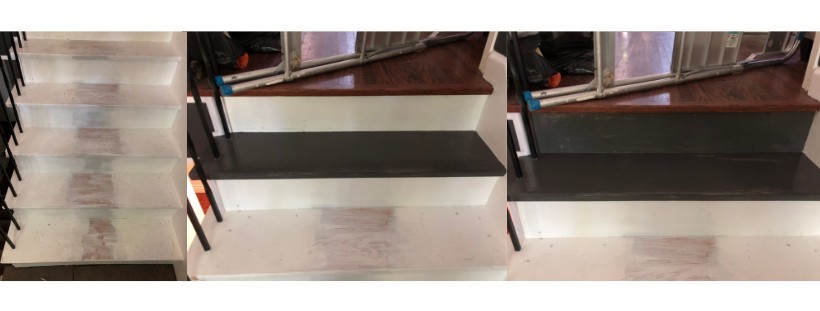
I did the same thing with the paint as I did with the primer, I left it over night between coats so it was compltely dry. Yes the project took a bit longer because I did it that way but the finshed product was worth the wait. I purchsed small sponge rollers and a tray for the project expecting to use them, however I found it was just as easy to cut in the stairs and fill it in with the brush then to have to stop and get the roller out as well. Once the paint dried the finish was smooth.
The over all cost for the project was $195 between paint and supplies. I Chose to purchase full gallons over quarts of pain because the cost saving. A quart may have been enough to finish the project, would have been tight. But if I had to go back and buy another one it would have cost me more then if I purchaesed the gallon in the first place. And lastly I do have some more projects I want to do with the paint, and I like have some left overs I can keep in the basement incase I need to do touch ups. The roller and tray set I purchased and didnt use was a $7.99 set, I still have the recipt so Ill just return it next time Im at Home Depot.
Eventually I will be changing out the railing , it needs to be updated, especially with all the work being put in the landing. I havn’t decided what route I want to go just yet so in the mean time it will serve its function.
It is not like me to not figure out all the details before I start a ptoject, but this time I wanted to take care of things that couldn’t wait in hopes for some ispiration for the railing once it all started to come together.
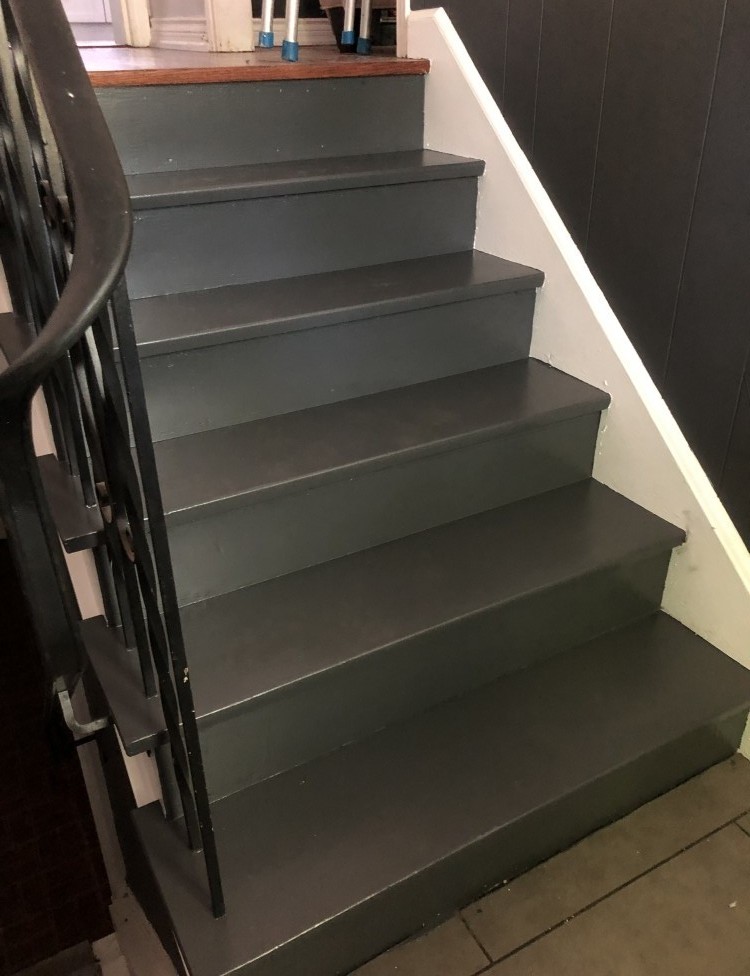
Overall it was an easy project to do. Just takes some patiance. Later in the week I will do the second set of stairs going into the basement and then lastly the new tile. I will post later about the tileing project and also share a picture of the completed work.
If you have any questions for me your always welcome to leave a comment below…