Interior Lighting
Interior lighting is one of those projects that almost seems to get forgotten when people are considering updating a room or decorating their home.
There is a lot more involved in doing your lighting then you may think. You need to consider the size of the fixture in proportion to the space, the color of the bulbs because they will effect your paint and finishes colors, and the style or theme you are working within when choosing the fixture.
To help walk you through the process I have chosen a decor project I have been working on with a client to show you just how much the proper lighting can completely change the look of the space and really be part of the decor plan rather then just something that exits and is forgotten.
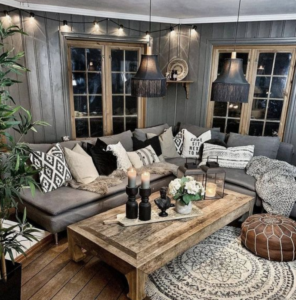
The Project Theme
For this project the new updated theme will be Rustic Chic. This theme has really hit the industry by storm. The increased popularity in the recent years has made antique shopping and the use of reclaimed wood and metal materials a staple in every decor concept. Further the concept is mixed in with crystal and glass finishes, along with shine and metallic to get that glamour chic effect.
The house I have been working on is one that doesn’t really have a full identity yet. The previous owners started with a country theme and then during renovations decided to make it more contemporary. This was an attempt to make it more appealing to buyers as they were listing it for sale. The property eventually sold. But the new home owners knew they would have to do some updates, and thats where I came in….
How I Chose The Lighting
There are lots of different elements going into this project, but here we will just focus on the lighting.
Before you start you really want to do a walk through of the home. During this walkthrough you are going to look for placement of the lights, size and clearance of the fixtures, and the number of fixtures you have and will need to replace.
When you do this walkthrough you may be surprised at what you notice, you may have underestimated how many lights you have in your home. This project can get very expensive, so it is important to plan and budget before you get started. An unfinished project can be worse then one that never got started.
I like to do a visual catalog of all the lights. I take a picture of every fixture and where they are located so that I can make sure I don’t forget anything while making my plan. I also like to draw out a floor plan and map out the lights on it as well, this way I can keep in mind sight lines so that when Im picking fixture that can be seen from one room to another they work together and don’t create a visual eye sore.
Once I have all of this in play I start to look for inspiration. If I have the opportunity to go out I will stop off at Home Sense and Pier One, and sometimes a few hardware store to see whats available. Usually I start my projects at the clients house so I go online to Wayfair.ca. I like their ‘see it in your home option’, where you can choose an item and then use the camera on your phone to see how it would look in your space. Clients really like it too.
 This can really come in handy for people who can’t visualize what it will look like or in my case to show clients live before I order the fixture incase they want to see them first. Im also a big fan of the interactive approach to shopping. Sometimes things you think will look great in your home don’t turn out the way you thought once you bring them home.
Yes you can still see your light under it and visually it can be distracting, but remember, this is just meant as a tool to get you started.
If your someone that like to see multiple options, try a few different lighting choices and then print them off. Lay them out in the room you would be using them along with any other samples you have and create yourself an image board. This may help you decide what fixture will work best with your design concept.
Once you have decided on your fixtures you are ready to put the order in. Some items may take longer then others, so if you are doing a multi item order you can sometimes get multiple shipments. The good thing is, if your order is $75 or more you will get free shipping for your whole order even if the items come separately and in different days.
I got my items within a week of placing my order and I was ready to take them to my client for the install.
Side note, electricity is a tricky thing, if you are not comfortable or knowledgeable you may want to consider asking someone who is or hiring an installer to do it professionally for you.
Below is the before and after picture one of the bedrooms in the home. The room still needs to be painted, and there is a country styled feature wall with barn board still to go into the back wall but at this time the room is well in the way. When the feature wall project is completed there will be a page in the DIY section of this site with step by step process of how we did it.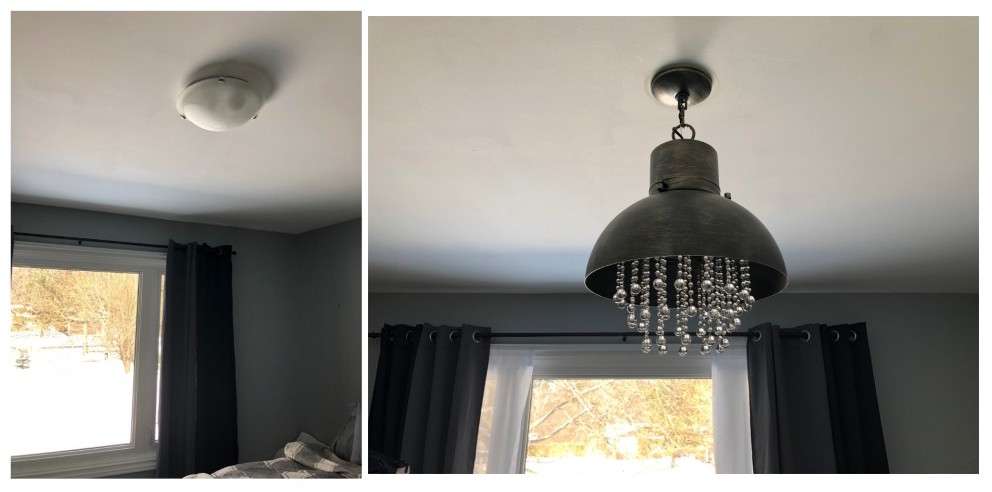 How I Installed My Lights
Not all fixtures install the exact same way, but for the most part there are a few key things. First you will want I make sure the power source to that light in the room is turned off before you even start to work with the fixture change. To do this you will want to start at the breaker box and turn the breaker off for that room. If your breaker box is labeled, your laughing, if it’s is not you may need someone to let you know when you have turned the right breaker off that affects the power to the light.
Once the poser is off it is safe to remove the existing fixture and prepare to add the new one. Typically there is a white wire and a black wire in the light box in your ceiling. If you have those, the white is your neutral and the black is your hot. Your new lighting fixture will come with a neutral to be tied into the white and a hot to be tied into the black wires that are in the ceiling box. There will also be a ground that will be screwed down into the metal bad that screws in across the box.

Sometimes the wires can be hard to identify if the are painted or older, just take your time and really look at what your are doing.
Sometimes there is a extra wire or two in the box, if you find a red wire, that is an additional hit wire that is sometimes not used for a ceiling fan. And if you find a green wire, that can be an additional ground wire in the box. The green wire isn’t found often, but if you find a red one you can just leave it tied off with an electrical cap.
Once all the wires were connected I was able to fasten the rest of the airport together and attach the light to the ceiling.
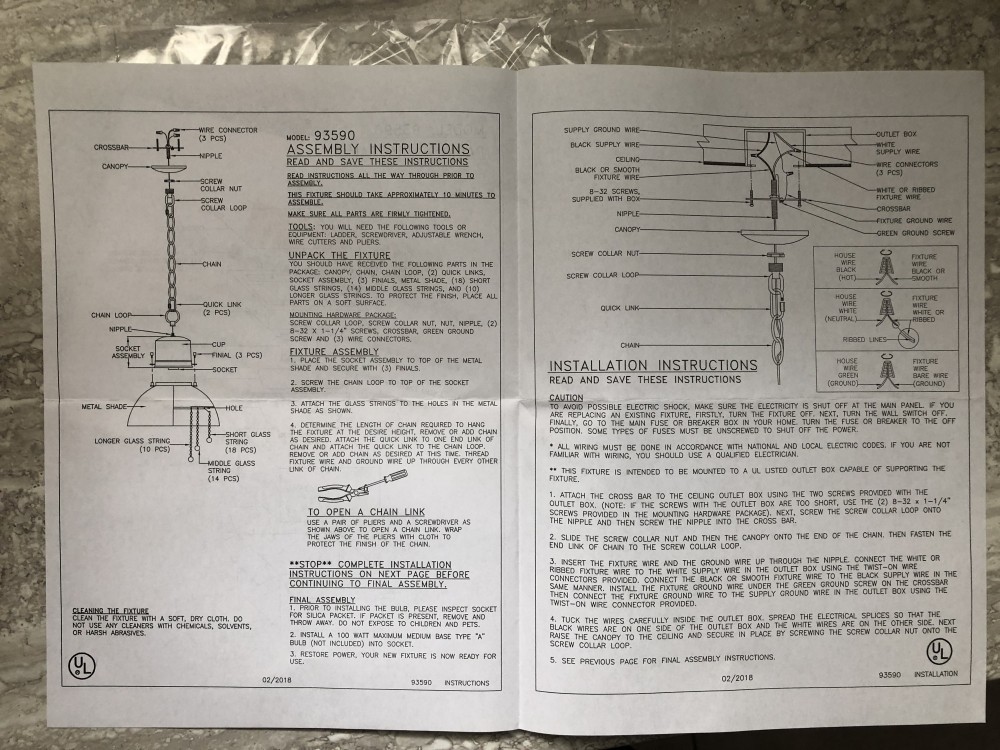
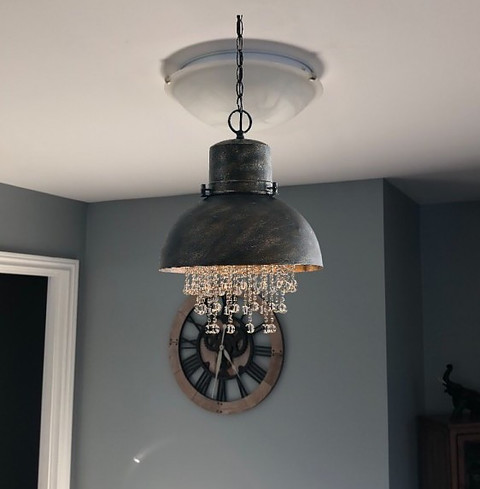
The light came with detailed instruction which I found very helpful. In the instruction is did say to put the crystals in before you instal, I decided to do it after. I found that it was easier because I would be trying to hold up the light and tie in the wires while trying not to knock out the crystals. Once the light was installed I found it very easy to hang all the crystals in the order they are sopose to go in.
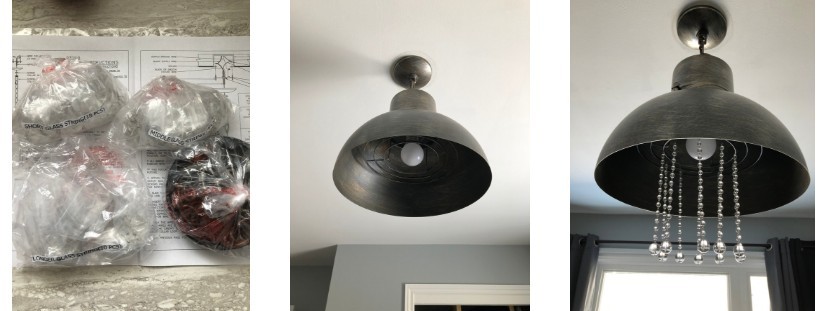
A little tip, don’t put the crystals on until you put in a light bulb, turn the breaker back on and see that the light works. Nothing worse then finishing putting all the crystals on, thinking everything is ok and then turning the breaker on and the light doesn’t work. Trying then to dismantle the pendant and fiddle with the wiring will be a major pain in the butt. I speak from experience on this tip…
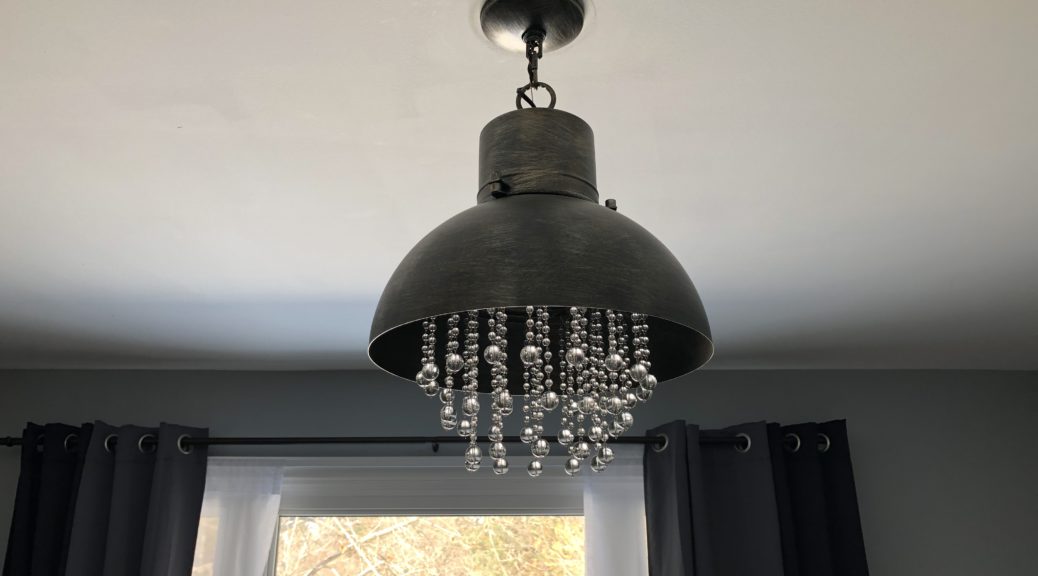
Once everything was in place and I got to stand back and take a good look at the light, it really was better then the picture and is perfect for the space. The pendant hangs just above the king sized bed. And once the rest of the decor elements in the room are finished it will be the perfect finishing touch. I like it so much in the clients home I ordered one for mine.
I have a few more lighting projects to come, I will update this post as I complete them.